| • | Steps for Printing Item Barcodes |
| • | Using the IDAutomation Code 39 Font |
Steps for Printing Item Barcodes
If a staff workstation has a barcode font installed that understands the algorithm of your library’s barcodes, you can use the Label Designer wizard to print existing item barcode labels that match the item IDs (barcodes) in the item records and also include other text or bibliographic data.

SirsiDynix does not supply the barcode font. It is your responsibility to obtain an appropriate font that matches your item labels. For instance, IDAutomation.com supplies the Code 39.TTF font.
The SirsiDynix Symphony Label Designer wizard functionality offers the option of selecting a font to use for label printing. If the intent is to print item barcodes using a font such as IdAutomation Code 39, please note that you may need to work with the font provider and the manufacturer of your scanner to determine the exact label template settings, such as font size and preceding/trailing characters.
To print item barcode labels
| 1 | Install the appropriate barcode label font on the staff workstation. |
| 2 | Follow the steps for the Label Designer Wizard to design an item barcode label template. |
| 3 | When creating the template, in the Label Designer Label Template window, click the Font button, and select the font for printing item barcodes, such as Code 39.TTF. |
| 4 | In the Label pane, be sure to select Item ID as the Value to print on the label. Also, the font may require that you enter start/stop characters. For example, Code 39 font can use an exclamation point as the start/stop characters. |
| 5 | Click OK to save the template. |
| 6 | Ensure that the barcode label stock is in the printer. |
| 7 | After you create a label template, click the Print Labels helper to print labels automatically using your computer’s current printer settings. |
Using the IDAutomation Code 39 Font
In the Label Designer, fonts are specific to one label. If you assign the IDautomation Code 39 font to a label, you will find that although the font can print text, it does not include all lower and uppercase characters, and so it is not particularly useful for printing text. For example, the font will not print an uppercase W, lower case j, h, and others. If you want to add text and a barcode to one physical label, the flexibility of the Label Designer can be used to create a template that will solve this problem. SirsiDynix developed a sample label template that illustrates how a label template can be designed to “split” one physical label into two “labels” so that the IDautomation.com font can be used to print the item barcode on one part of the physical label, and another font can be used to print text such as the call number, library, and other information on the other part of the physical label.
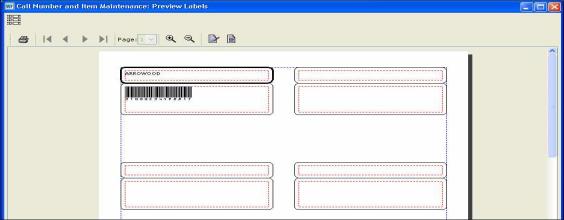
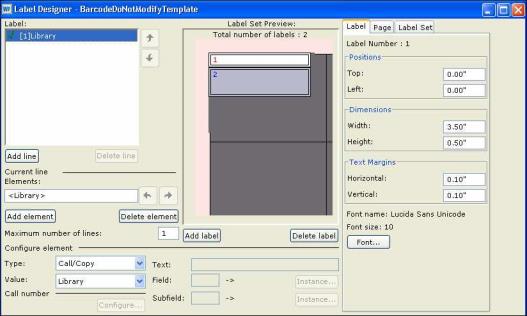
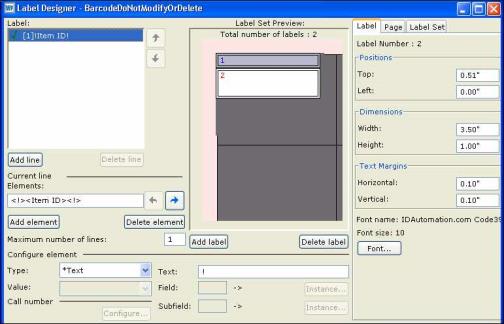
The following example template has two labels defined. Label 1 is defined so that the Library name will print on the first part of the physical label. Label 2 is defined so that the barcode will print on the second half of the physical label. The following images are of a sample label template using the IDautomation.com font to print text and a barcode on the same physical label. Although the Print Preview Labels helper displays this as two physical labels, the position of Label 2 will actually cause the elements from both labels to print closely enough to print on the same physical label.
Single libraries cannot print the Library name using a Call/Copy element, even though Library displays in the drop-down list for this element. To print the library name on a label, single libraries will need to add the name as a Text element.
Example of previewing the label with the Print Preview Labels helper:
Example of viewing the template’s Label 1 in the Label Designer wizard:
Example of viewing the template’s Label 2:
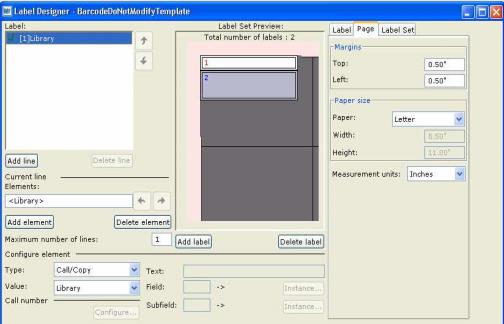
Example of viewing the template’s Page settings:
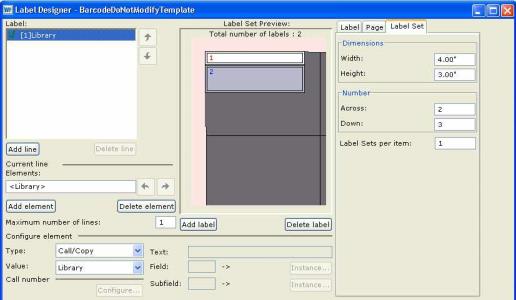
Example of viewing the template’s Label Set settings:
Related topics